Skip to content


Picture this: A family in Idaho Falls wakes up with headaches on a cold winter morning. Their carbon monoxide detector sits silent on the wall. The question everyone should ask is it protecting them, or has it become just another forgotten device collecting dust?
Many homeowners never test their CO detectors after installation. They assume the alarm will sound if carbon monoxide is present. Meanwhile, sensors degrade, batteries die, and entire units expire without warning. The good news is that testing your carbon monoxide detector takes just minutes, and knowing the warning signs can keep your family safe.
What you’ll learn in this guide:
- How to properly test your CO detector monthly
- What different beeping patterns actually mean
- When to replace your detector (it’s sooner than you think)
- How your HVAC system relates to carbon monoxide safety
- Emergency response steps that could save your family
How Do I Know If My Carbon Monoxide Detector Is Working?
Testing your carbon monoxide detector should be part of your monthly home safety routine. Most homeowners install these devices and forget about them, which is dangerous when it comes to protecting your family from this silent killer.
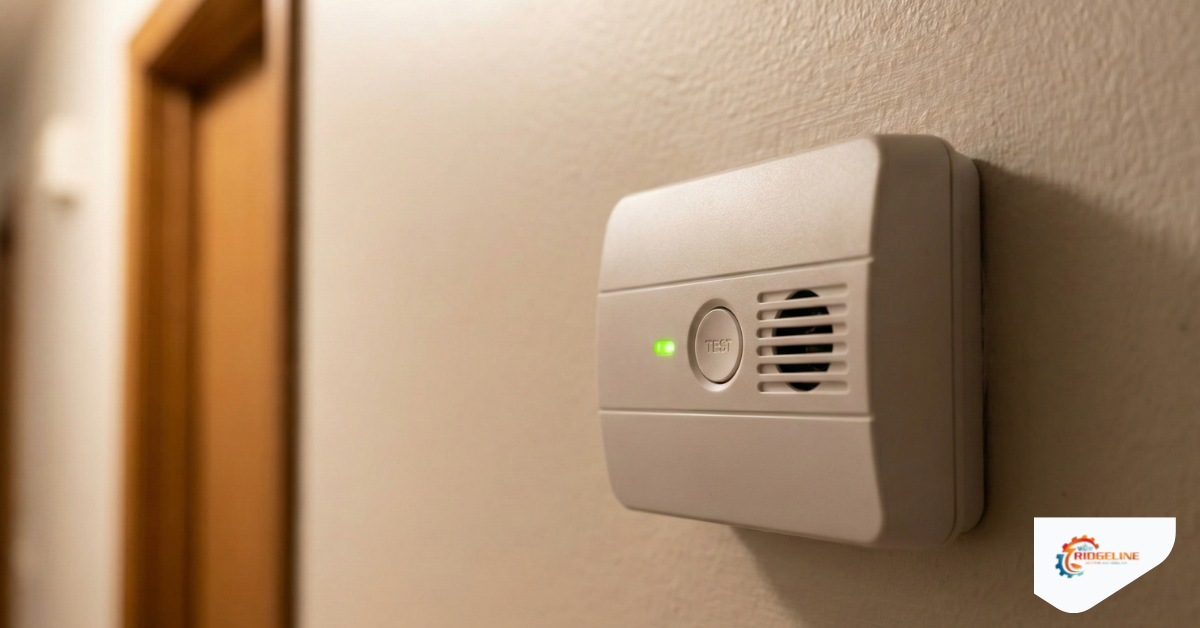
The Monthly Test Button Check
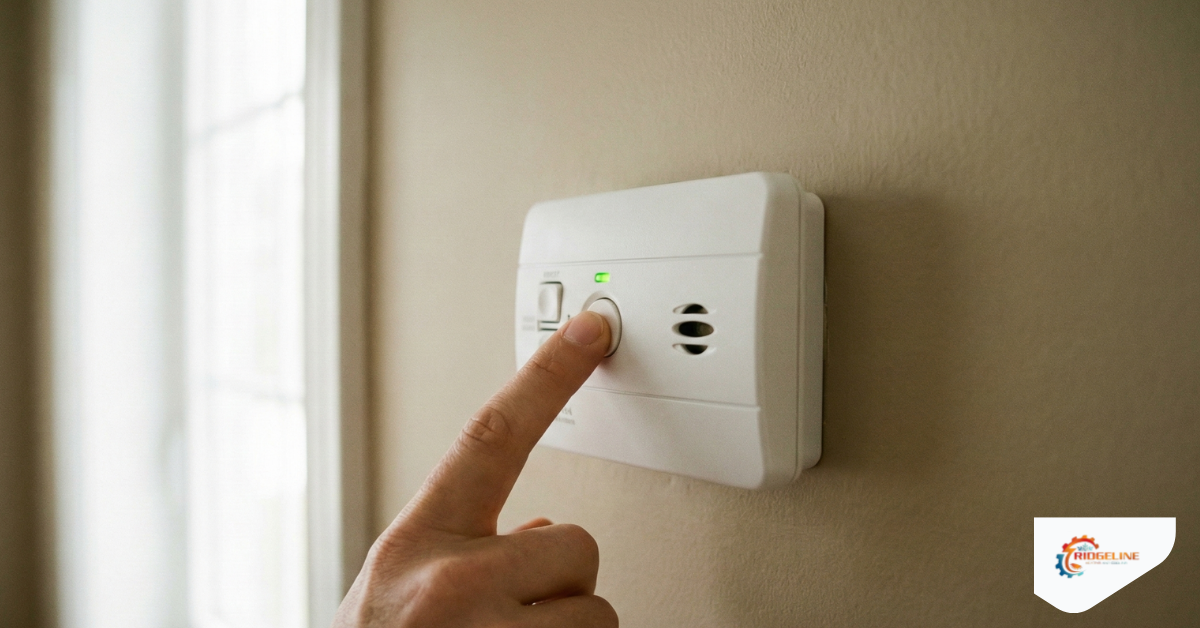
Every carbon monoxide detector has a test button, usually on the front panel. First Alert testing guidelines recommend a simple monthly testing process that takes less than 60 seconds.
How to test your CO detector:
- Locate the test button (labeled “TEST” or “TEST/SILENCE”)
- Press and hold the button for 5-10 seconds
- Listen for 4 beeps, a pause, then 4 more beeps
- Verify the alarm is loud enough to wake sleeping family members
- Have someone in the farthest room confirm they can hear it
If your detector doesn’t beep:
- Replace the batteries immediately
- Test again with fresh batteries
- If still no sound, replace the entire detector
- Don’t assume silence means it’s working
Set up a monthly testing schedule:
- Choose the first day of each month
- Test when you pay your mortgage or rent
- Set a phone reminder that repeats monthly
- Mark it on your family calendar
- Make it a household safety routine
What the Test Button Actually Tests (And What It Doesn’t)
Here’s something most homeowners don’t know: the test button only confirms your detector has power and the alarm works. According to industry testing standards, it doesn’t verify the sensor can actually detect carbon monoxide gas.
What the test button DOES confirm:
- Battery or electrical power supply is working
- Alarm speaker functions properly
- Internal circuit board is operational
- LED indicator lights are functioning
- The alert system can make noise
What the test button DOESN’T test:
- The CO sensor’s ability to detect gas
- Sensor sensitivity and accuracy levels
- Whether the unit has reached end-of-life
- If detector placement is effective
- Actual carbon monoxide detection capability
Think of it like checking if your car’s horn works. The horn might sound perfect, but that doesn’t mean your brakes function properly. Similarly, a beeping CO detector doesn’t guarantee the sensor inside can detect dangerous gas levels. This is why annual heating maintenance is so valuable.
Benefits of professional CO testing:
- Calibrated equipment verifies actual detection
- Technicians measure real CO levels in your home
- Identifies hidden problems before they’re dangerous
- Confirms your detector responds appropriately
- Complete peace of mind for your family’s safety
Advanced Testing with Actual Carbon Monoxide
Some homeowners want to verify their detector’s sensor still works between professional inspections. Professional CO testing kits are available at hardware stores, but there’s a simpler household method that many safety experts use for digital detectors with number displays.
The incense stick testing method:
- Use only digital detectors with numerical displays
- Light an incense stick and let it produce smoke
- Hold it 6-8 inches from the detector
- Watch the display for any CO reading changes
- Numbers should increase slightly (even just a few ppm)
- This confirms the sensor is still responsive
Important safety precautions:
- Never use car exhaust or generators for testing
- Don’t use this method on non-digital detectors
- Keep incense at a safe distance from the unit
- Test in a well-ventilated room
- This produces very low, safe CO levels only
- If uncomfortable, schedule professional inspection instead
The incense method works because burning incense produces small amounts of carbon monoxide in a controlled, safe manner. A working sensor should detect even these tiny amounts and display the reading on your digital screen.
Why professional testing is better:
- Calibrated CO meters provide precise measurements
- Technicians check combustion efficiency in heating systems
- They verify home CO levels are safe throughout
- Identifies problems before they become dangerous
- Complete confidence in your detectors and furnace
What Are the Warning Signs Your CO Detector Has Failed?
Your carbon monoxide detector uses different beeping patterns and visual signals to communicate. Understanding these warnings can save your life and your family’s lives.
Understanding Different Beeping Patterns
Your carbon monoxide detector uses different beeping patterns to communicate specific situations. Detector manufacturer specifications define what each pattern means.
4 beeps + pause + 4 beeps (EMERGENCY):
- Pattern repeats continuously
- Dangerous carbon monoxide detected
- Evacuate immediately
- Call 911 from outside
1 beep every minute (Low Battery):
- Single chirp at regular intervals
- Replace batteries immediately
- Test detector after replacement
- Don’t wait, this is your only warning
Chirping every 30 seconds (End-of-Life):
- Faster than low battery chirping
- Detector has expired completely
- Cannot be fixed by replacing batteries
- Replace entire unit immediately
Irregular beeping (Malfunction):
- Random or inconsistent chirps
- May indicate sensor problems
- Could be dust or humidity
- Clean detector or replace if continues
Many homeowners mistake end-of-life chirping for low batteries. If replacing batteries doesn’t stop the beeping, check your detector’s age. It’s probably expired.
End-of-Life Indicators You Shouldn’t Ignore
Carbon monoxide detectors show both audible and visual signs when reaching end of life. Fire safety experts recommend watching for these warning signs.
Visual signs of detector failure:
- Yellowed or discolored plastic housing
- Dusty appearance that won’t clean off
- Faded manufacturing labels
- Visible wear or cracks in case
Functional warning signs:
- Chirps every 30 seconds continuously
- Digital display shows “ERR” or “END”
- Doesn’t respond to test button
- Goes off randomly without cause
Age-related indicators:
- Unit is over 7 years old
- Can’t find manufacture date on back
- Purchased when you moved in years ago
- Already installed when you bought home
According to sensor degradation research, internal sensors lose sensitivity over time. Even normal CO exposure gradually reduces accuracy. Replacement isn’t optional, it’s essential for safety.
Visual Signs of a Failing Detector
Walk over to your carbon monoxide detector right now and look at it. A quick visual inspection can tell you a lot about whether your detector is still protecting your family effectively.
Signs your detector is working properly:
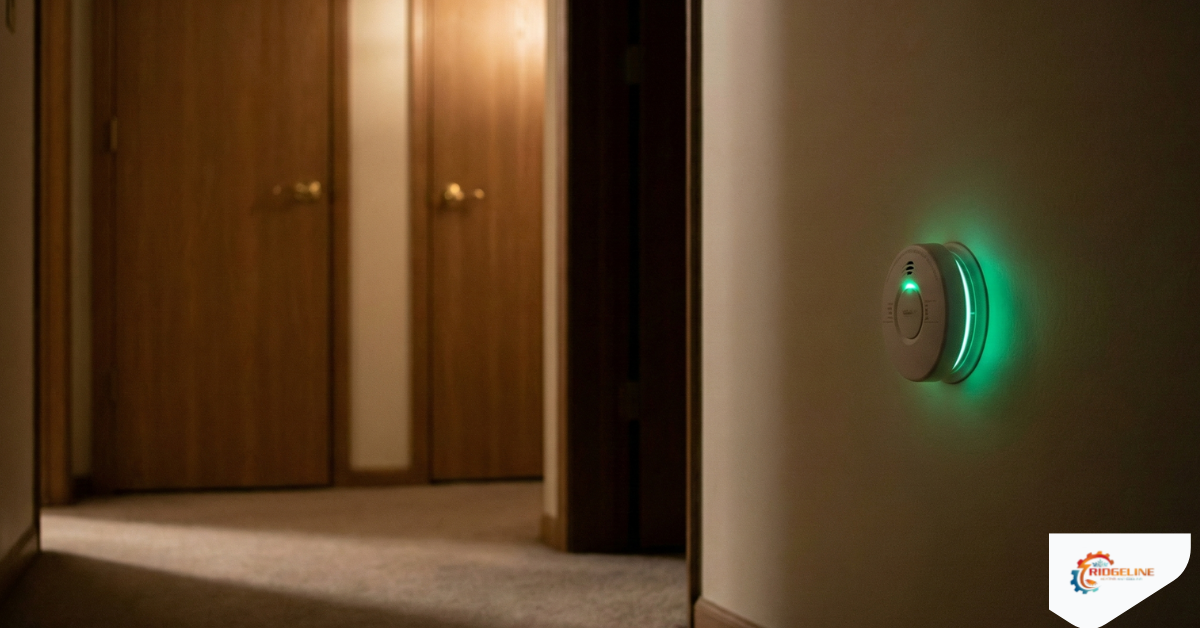
- Clean, white or off-white appearance
- Green LED light indicates power
- Clear, readable labels and text
- Firmly mounted on wall or ceiling
- Free of dust, dirt, and debris
- No visible damage or wear
Red flags that demand immediate attention:
- Thick layer of dust or grime buildup
- Yellow or brown discoloration of plastic
- Unit hanging loose from mounting bracket
- Cracked or damaged housing
- No LED light visible at all
- Faded or unreadable labels
Even if your detector passes the test button check, visible deterioration indicates it’s time for replacement. Modern detectors are designed to look good and function perfectly for their entire lifespan. When they start looking old, worn, or damaged, they probably are old and should be replaced regardless of age.
How Often Should You Replace Your Carbon Monoxide Detector?
The simple answer: Replace your carbon monoxide detector every 5 to 7 years, no exceptions.
Detector lifespan by type:
- Battery-operated units: 5-7 years
- Hardwired units: 5-7 years
- Sealed 10-year battery models: Up to 10 years
- Always follow manufacturer’s specific guidelines
This isn’t a suggestion, it’s a requirement for maintaining functional carbon monoxide detection in your home.
The 5-7 Year Replacement Rule
Carbon monoxide detectors have shorter lifespans than smoke detectors because the sensor technology degrades faster.
Why detectors expire:
- Electrochemical sensors wear out naturally
- Airborne particles damage sensors over time
- Temperature fluctuations affect accuracy
- Each CO detection event reduces sensor life
- Electronic components naturally degrade
Replacement cost vs. risk:
- New detector: $20-50
- Professional HVAC system diagnostics after CO exposure: $150-300
- Emergency room visit for CO poisoning: Thousands of dollars
- Peace of mind from working detector: Priceless
Don’t try to squeeze extra years from an expired detector. The small cost of replacement is nothing compared to the risk of carbon monoxide poisoning.
How to Check Your Detector’s Age
Not sure how old your carbon monoxide detector is? Manufacturer guidelines make it easy to find out with a simple inspection.
Steps to find your detector’s age:
- Remove the detector from wall or ceiling mount
- Turn the unit over to see the back
- Look for “Manufactured Date” or “Build Date” label
- Some units show “Replace By” date instead
- Calculate years since manufacture
- If 7+ years old, replace immediately
If you can’t find a manufacture date:
- Assume the detector is expired and replace it
- Don’t risk your family’s safety by guessing
- Write installation date on new detector
- Set calendar reminder for 7 years ahead
- Consider all unmarked detectors as expired
Common situations requiring replacement:
- Previous homeowner installed it years ago
- Builder installed basic detector you forgot about
- Unit was already there when you moved in
- Can’t remember when you last replaced it
- Labels are too faded to read
Here’s a best practice that takes 10 seconds: When you install a new detector, write the installation date directly on the unit with a permanent marker where you can see it without removing the detector from the wall. Include the month and year clearly. Your future self will thank you when it’s time for the next replacement.
Why Sensors Lose Effectiveness Over Time
Understanding why carbon monoxide detectors expire helps you take replacement seriously. It’s not planned obsolescence, it’s basic chemistry and physics.
How electrochemical CO sensors work:
- Contain a gel electrolyte inside
- Carbon monoxide reacts with the gel
- Reaction creates measurable electrical current
- Detector sounds alarm when current exceeds thresholds
What causes sensor degradation:
- Gel electrolyte dries out naturally over time
- Airborne chemicals and pollutants contaminate sensors
- Each CO detection event slightly damages sensor
- Extreme temperatures accelerate aging
- Humidity and dust interfere with accuracy
The sensor does real chemical work every moment it’s powered on. Like any working component, it eventually wears out. Even unused detectors in the package have expiration dates because aging begins at manufacture.
What Causes False Alarms in Carbon Monoxide Detectors?
Before assuming your detector is malfunctioning, understand that some “false alarms” are actually your detector working correctly by detecting temporary CO sources.
Common Household Triggers
Your carbon monoxide detector can be triggered by several non-emergency situations. Home safety guidelines identify these common causes of false alarms.
Environmental factors that trigger alarms:
- High humidity from showers or steam
- Dust, pet hair, or debris in sensor vents
- Strong chemical fumes from cleaning products
- Cooking smoke or grease particles
- Rapid temperature changes from opening windows
Temporary CO sources (these are real, not false):
- Running car in attached garage
- Using gas stove or oven for heat
- Portable generators placed too close to home
- Blocked furnace vents during heavy snow
- Fireplace with poor draft or backdrafting
What to do if detector goes off briefly:
- Check for obvious CO sources (vehicles, generators)
- Ventilate home by opening windows and doors
- Monitor for repeated alarms
- Don’t assume it’s broken or ignore it
Placement Mistakes That Cause False Readings
Where you install your carbon monoxide detector matters as much as having one. Proper placement prevents false alarms while ensuring real dangers are detected.
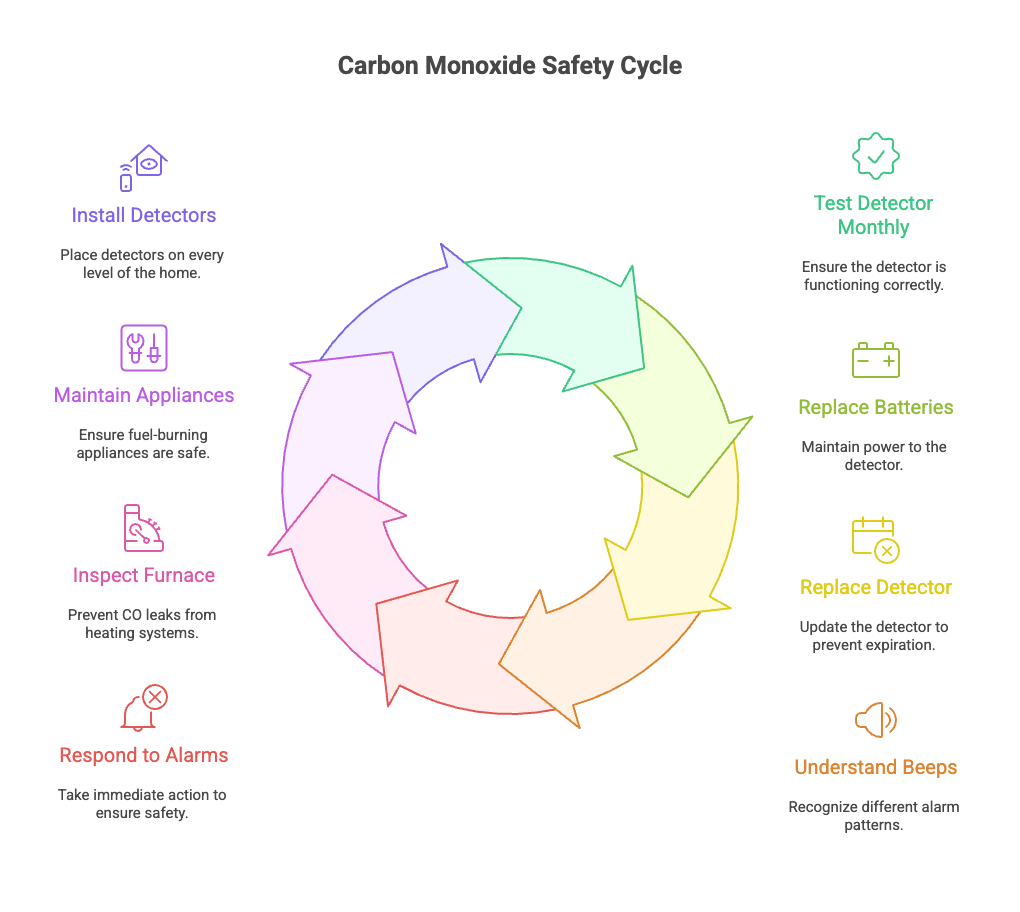
- Install on every level of your home
- Place one near each sleeping area
- Mount at least 5 feet from fuel-burning appliances
- Keep 15 feet away from furnaces and water heaters
- Position away from bathrooms and kitchens
- Avoid direct sunlight and heat sources
Common placement mistakes to avoid:
- Right next to the furnace
- Inside bathrooms (humidity issues)
- Near ceiling fans or air vents
- In unheated garages or attics
- Behind furniture or curtains
Best locations for CO detectors:
- Hallways outside bedrooms
- Top of stairs on each level
- Main living areas where family spends time
- Near (not inside) attached garages
Carbon monoxide is roughly the same weight as air, so detectors work equally well on walls or ceilings. Just make sure family members can hear the alarm from anywhere in the home.
When a “False Alarm” Might Actually Be Real
What you think is a false alarm might actually be low-level carbon monoxide that your body doesn’t immediately recognize as a threat.
CO exposure levels and detector response times:
- 70-80 ppm: Alarm after about 2 hours
- 150-200 ppm: Alarm within 10-50 minutes
- 400 ppm: Alarm within 4-15 minutes
- 800+ ppm: Can cause unconsciousness in minutes
According to National Institute of Standards and Technology guidelines, even low levels can be dangerous over extended exposure.
Why “false alarms” deserve investigation:
- Low CO levels may not cause immediate symptoms
- Detector might be catching intermittent leaks
- Furnace problems often release CO in cycles
- What seems fine could be dangerous to children or pets
Take alarms seriously when:
- Detector goes off multiple times in a day
- Any family members have headaches or nausea
- Alarm sounds after furnace starts up
- Multiple detectors alarm at same time
If your detector alarms, even if you feel fine, evacuate and call for help. Carbon monoxide poisoning symptoms mimic the flu: headaches, dizziness, nausea, and fatigue. Better to have emergency responders check a false alarm than ignore a real danger.
How Does Your HVAC System Relate to Carbon Monoxide Safety?
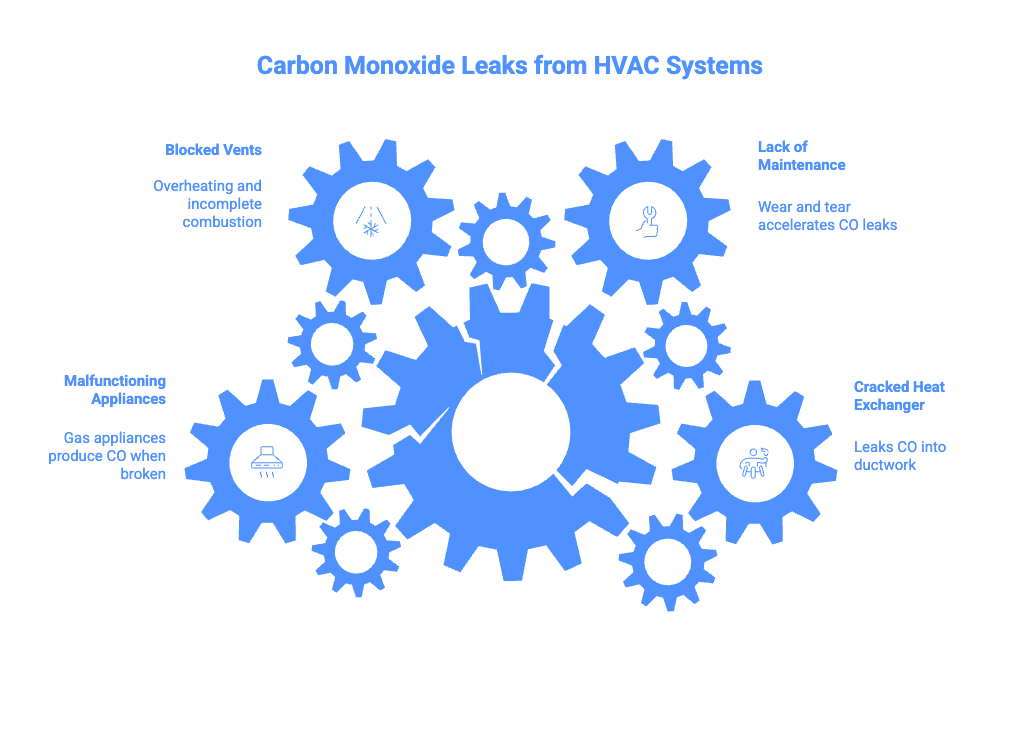
Your furnace, water heater, and fuel-burning appliances are the primary CO sources in your home. Understanding this connection helps you prevent problems before they start.
Heat Exchanger Cracks and CO Leaks
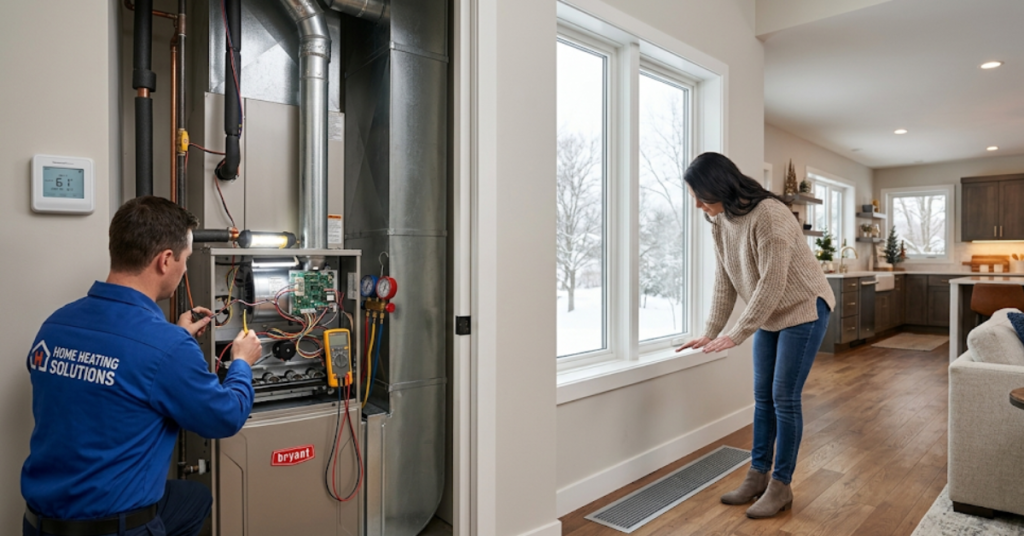
The most dangerous carbon monoxide source in most homes is a cracked furnace heat exchanger. Furnace safety research shows this hidden hazard sends families to emergency rooms every heating season, especially during cold Idaho winters when furnaces run continuously.
What your heat exchanger does:
- Separates combustion gases from breathable air
- Allows heat transfer without mixing gases
- Acts as protective barrier in your furnace
- Keeps carbon monoxide out of your home
- When cracked, leaks CO directly into ductwork
Warning signs of heat exchanger problems:
- Strange chemical or burning smells from vents
- Yellow or orange furnace flames (should be blue)
- Excessive soot buildup around furnace
- Water pooling near the furnace base
- Furnace cycling on and off frequently
- Unusual noises during furnace operation
Common causes of heat exchanger cracks:
- Normal wear and tear over 15-20 years
- Lack of regular maintenance and cleaning
- Restricted airflow from dirty filters
- Overheating from blocked vents
- Manufacturing defects or poor installation
- Corrosion from combustion byproducts
Here’s the scary part that keeps HVAC technicians up at night: a cracked heat exchanger might not trigger your CO detector immediately. Small cracks release carbon monoxide in low amounts that build up gradually over hours. Your family breathes contaminated air while CO levels slowly climb toward dangerous thresholds. This is why annual furnace inspections with combustion testing are essential, not optional maintenance you can skip.
Why Annual Furnace Inspections Matter
Professional furnace maintenance does more than keep your heating system running efficiently and prevent inconvenient breakdowns. It’s your first line of defense against carbon monoxide leaks that could harm or kill your family.
What technicians check during annual heating maintenance:
- Heat exchanger condition with visual inspection
- Combustion efficiency and CO levels in flue gases
- Proper venting and exhaust pipe connections
- Gas line connections checked for leaks
- Burner flame color and combustion pattern
- Carbon monoxide levels in living spaces
- All safety controls and limit switches
Early problems professionals catch before they’re dangerous:
- Minor heat exchanger cracks before they worsen
- Improper combustion causing elevated CO levels
- Blocked or damaged vent pipes
- Loose gas line connections
- Age-related component wear
- Burner alignment issues
- Draft problems that cause backdrafting
Idaho-specific safety considerations:
- Cold winters mean furnaces run constantly for months
- Extended operation accelerates all component wear
- Heavy snow can block outdoor exhaust vents
- Older furnaces in Idaho Falls homes need closer monitoring
- Altitude affects proper combustion settings
Schedule furnace maintenance every fall before heating season starts in earnest. Catching problems in September or October prevents dangerous mid-winter failures when your family depends on heat most and technicians are busiest with emergency calls. If your carbon monoxide detector keeps going off, schedule a professional HVAC safety inspection immediately, even if you just had maintenance. Intermittent alarms indicate a problem that needs expert diagnosis.
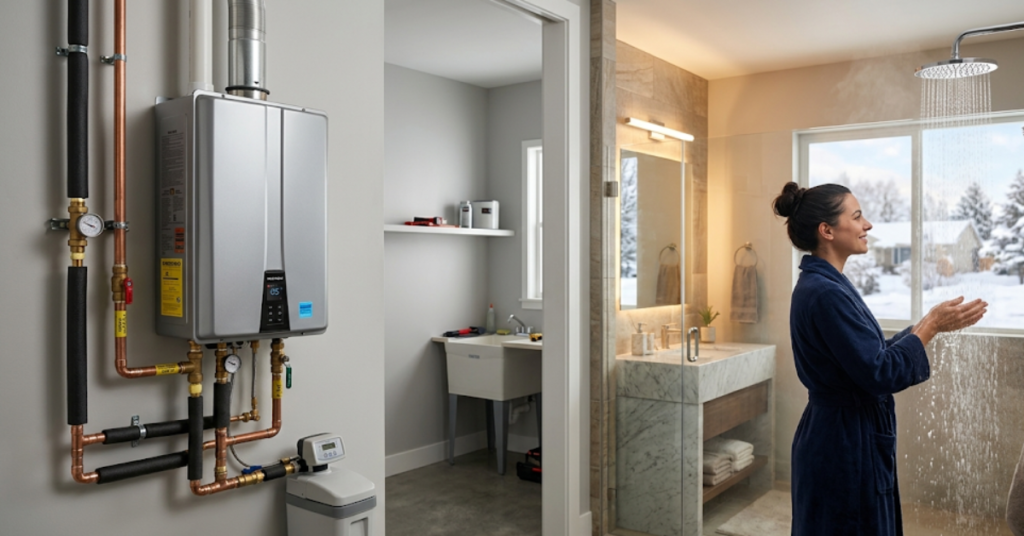
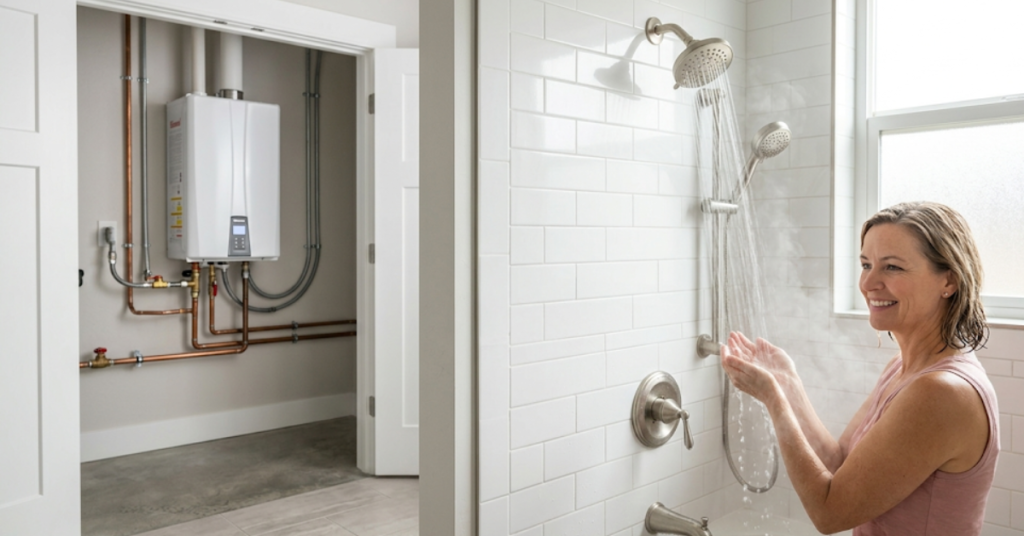
Gas Appliances and Indoor Air Quality
Beyond your furnace, several other appliances can produce carbon monoxide if they malfunction or aren’t properly vented.
Common household CO sources beyond furnaces:
- Gas water heaters producing combustion byproducts
- Gas stoves and ovens during normal cooking
- Gas clothes dryers with blocked exhaust vents
- Fireplaces and wood stoves with draft problems
- Portable space heaters (especially older models)
- Generators that must stay 20+ feet from home
Essential maintenance prevents CO problems:
- Annual water heater inspections catch vent issues
- Regular fireplace and chimney cleaning prevents buildup
- Ensure proper ventilation for all gas appliances
- Never use generators indoors or in garages
- Keep outdoor vents clear of snow during winter
- Check dryer vents aren’t blocked by lint
Your complete home safety system should include:
- Working CO detectors on every level of home
- Professional furnace and appliance maintenance
- Indoor air quality solutions for complete protection
- Professional furnace installation using proper codes
- Regular inspection of all fuel-burning appliances
Consider your carbon monoxide detector as part of a complete home safety system, not a standalone solution. It works best when combined with proper maintenance, good ventilation, and professional HVAC service. One component can’t do all the work alone, just like your smoke detector can’t prevent fires by itself.
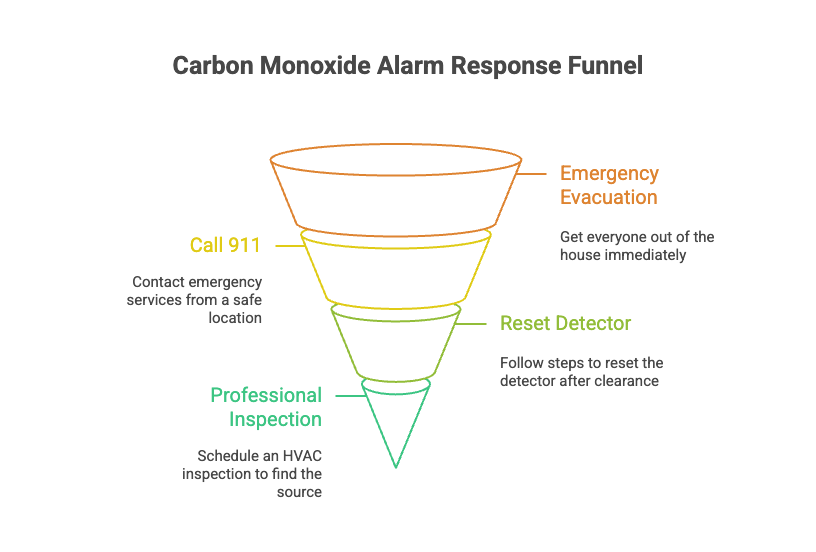
What Should You Do If Your CO Detector Goes Off?
Knowing how to respond to a carbon monoxide alarm can save lives. Here’s exactly what to do in emergency and non-emergency situations.
Emergency Response Steps
When your carbon monoxide detector sounds a continuous alarm with the 4-beep pattern, you have a life-threatening emergency. Emergency response protocols are clear and simple.
Immediate actions (do these NOW):
- Get everyone out of house immediately
- Take pets if safely possible
- Go to fresh air outside (not garage or car)
- Call 911 from safe location outside
- Do not go back inside for any reason
Do NOT do these things:
- Find the CO source
- Open windows first
- Turn off appliances
- Investigate basement or furnace room
- Grab belongings or valuables
Most vulnerable to CO poisoning:
- Small children and infants
- Pregnant women and unborn babies
- Elderly family members
- People with heart or lung conditions
- Pets (especially birds)
- Headache and dizziness
- Nausea or vomiting
- Weakness and confusion
- Shortness of breath
- Loss of consciousness
If anyone shows symptoms, tell 911 immediately. First responders will bring medical equipment and test CO levels before allowing anyone back inside.
How to Reset Your Detector Safely
After the fire department clears your home and repairs are completed, you’ll need to reset your carbon monoxide detector to resume normal operation.
Step-by-step reset procedure:
- Press and hold the reset button for 5-10 seconds
- Release when you hear a beep or see LED flash
- Wait for detector to complete self-test (1-2 minutes)
- Display should return to zero or normal reading
- Test the alarm function after resetting
- Verify green LED light is solid or blinking normally
After false alarms or low battery warnings:
- Replace batteries with fresh ones from sealed package
- Clean dust and debris from vents with soft brush
- Verify detector isn’t past expiration date
- Check manufacture date on back of unit
- Test monthly after resetting for continued function
- Monitor for any unusual chirping or beeping
Troubleshooting when reset doesn’t work:
- Check hardwired power source is connected properly
- Verify batteries installed correctly (check polarity)
- Look for end-of-life warnings (every 30 seconds chirping)
- Replace entire detector if over 7 years old
- Try unplugging for 30 seconds then reconnecting
- Consult manufacturer’s manual for model-specific steps
Some detectors auto-reset after battery changes or when the air clears. Others require manual reset following specific procedures. Check your owner’s manual for details, or look up your model online if you’ve lost the manual.
When to Call for Professional HVAC Inspection
Even after emergency services clear your home, you need to find and fix the source of carbon monoxide. This requires professional expertise and specialized equipment that emergency responders don’t typically provide. They verify your home is currently safe, but they don’t repair the underlying problem.
Schedule immediate professional inspection if:
- Your CO detector alarmed even once
- Multiple detectors went off simultaneously
- Any family members experienced symptoms
- Detector frequently chirps or shows low readings
- You notice unusual gas odors around furnace
- Furnace makes strange noises or smells
- Yellow or orange flames instead of blue
What HVAC professionals check during CO inspection:
- Combustion analysis of furnace efficiency
- Heat exchanger inspection with specialized cameras
- Flue and vent pipe integrity throughout system
- Gas line connections and proper pressure
- All fuel-burning appliances in your home
- Carbon monoxide levels in every room
- Backdrafting or draft problems
Professional equipment advantages over DIY:
- Calibrated CO meters detect levels below 5 ppm
- Borescope cameras see inside heat exchangers
- Combustion analyzers measure oxygen and CO precisely
- Pressure gauges confirm proper gas operation
- Thermal imaging cameras show hidden problems
- Manometers test draft and venting
Questions to ask your HVAC technician:
- What CO levels did you measure in my home?
- Is my furnace safe to operate right now?
- What repairs are needed immediately vs. soon?
- Should I replace or repair my heating system?
- How can I prevent future CO problems?
- What maintenance schedule do you recommend?
Never assume a carbon monoxide alarm was a malfunction without professional verification. HVAC system diagnostics identify problems that put your family at serious risk. The service call costs far less than emergency room visits for carbon monoxide poisoning or the ultimate price of ignoring a real danger.
Keep Your Family Safe with Working CO Detectors
Your carbon monoxide detector is only effective if it’s working properly. Test it monthly with the test button, understand what different beeping patterns mean, and replace the entire unit every 5-7 years without exception. These simple steps provide essential protection for your family against this invisible, odorless killer that claims hundreds of lives each year.
Your carbon monoxide safety checklist:
- Test detector monthly using test button
- Replace batteries twice yearly (or as needed)
- Replace entire detector every 5-7 years
- Know what different beeping patterns mean
- Respond immediately to emergency alarms
- Schedule annual furnace inspections
- Keep all fuel-burning appliances maintained
- Install detectors on every level of your home
Critical points to remember:
- Test button confirms power but NOT sensor function
- End-of-life chirping (every 30 seconds) means replace now
- Your furnace and gas appliances are primary CO sources
- Professional HVAC maintenance prevents CO leaks
- Even “working” detectors expire and need replacement
- Small cracks in heat exchangers release CO gradually
Carbon monoxide safety requires multiple layers of protection working together. Working detectors alert you to danger when it’s present, but proper maintenance of your heating system prevents the danger from occurring in the first place. Think of your detector as the last line of defense, not the only defense.
If your carbon monoxide detector keeps going off, don’t ignore it or assume it’s malfunctioning. Schedule a professional HVAC safety inspection to identify the source before it becomes a tragedy. Annual furnace inspections help prevent carbon monoxide risks before they become dangerous, giving you peace of mind throughout Idaho’s cold winters when your furnace runs constantly.
Ridgeline Heating and Cooling offers comprehensive safety inspections and complete HVAC services to protect your family from carbon monoxide and ensure your home stays comfortable year-round. Your family’s safety is worth the small investment in prevention.