Skip to content


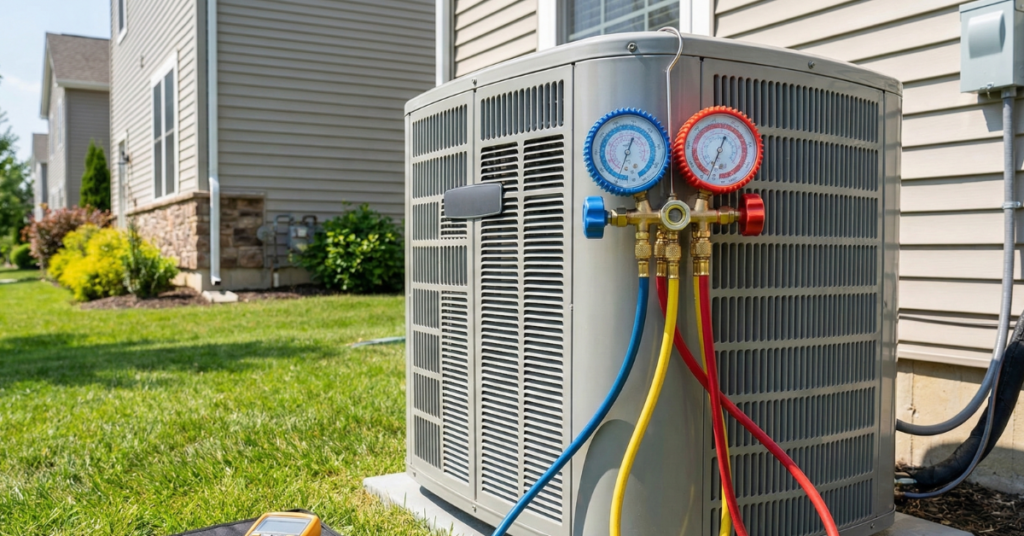
Most common HVAC problems, including no heating, no cooling, and weak airflow, can be traced to simple issues like a dirty air filter, incorrect thermostat settings, or a tripped circuit breaker. Before spending $75 to $200 on a professional diagnostic fee, Idaho Falls homeowners can often restore comfort in minutes by working through a few basic troubleshooting steps at home.
Key Takeaways
- Check your thermostat first. Dead batteries, incorrect mode settings, and accidental schedule changes are among the top reasons HVAC systems appear to stop working.
- Replace your air filter regularly. A clogged filter restricts airflow, forces your system to work harder, and can increase energy consumption by up to 15%.
- Know when to stop and call a pro. Refrigerant leaks, gas odors, electrical problems, and persistent issues always require a licensed HVAC contractor.
- Basic troubleshooting saves real money. The average HVAC repair costs around $351, but many service calls turn out to be minor fixes homeowners could have handled themselves.
- Annual maintenance prevents most emergency calls. Research shows that roughly 75% of no-heat calls during winter are caused by lack of routine maintenance.
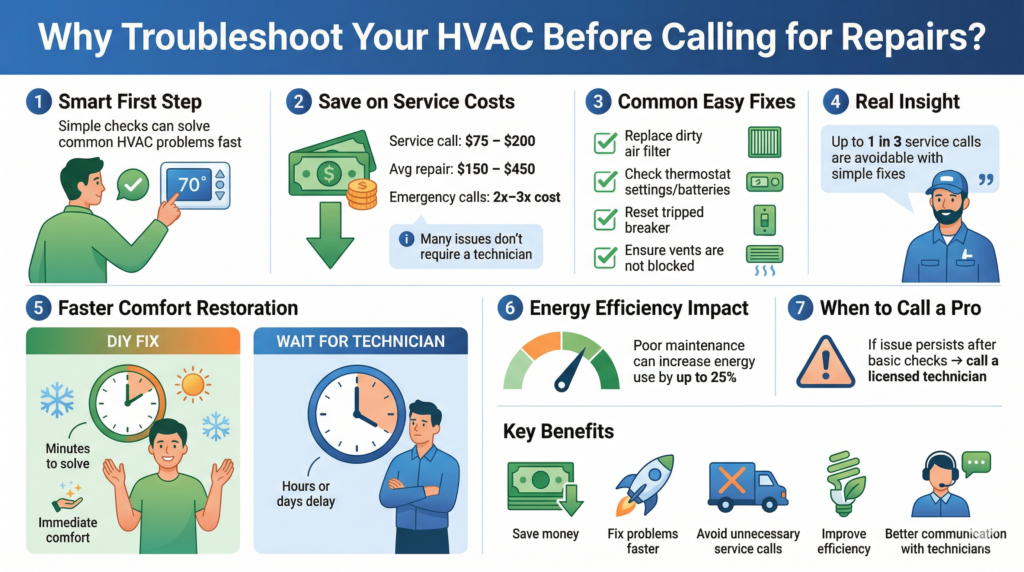
Why Should You Troubleshoot Your HVAC System Before Calling for Repairs?
Learning a few basic HVAC troubleshooting steps gives you the ability to solve minor problems quickly, avoid unnecessary service charges, and communicate more effectively with a technician when professional help is actually needed.
Save Money on Diagnostic Fees
A standard HVAC service call in 2026 costs between $75 and $200 just for a technician to arrive and diagnose the problem. That fee typically covers travel, inspection, and basic diagnostics, but it does not include the cost of parts or labor for the actual repair. According to HomeGuide, the national average for HVAC repairs runs about $150 to $450, with emergency and after-hours calls costing double or triple the standard rate.
Many of these service calls end up being simple fixes. As Michael Rother, a veteran HVAC service manager with over 20 years of field experience, puts it: “At least a third of residential service calls we respond to could have been avoided with a quick filter swap or thermostat battery change. Homeowners who know the basics save hundreds of dollars every year.”
Restore Comfort Faster With Quick Fixes
When your furnace stops producing heat on a cold Idaho Falls evening or your AC goes out during a July heatwave, waiting for a technician can take hours or even days during peak season. Simple checks like verifying your thermostat settings, resetting a tripped breaker, or replacing a dirty filter can restore comfort in minutes rather than hours.
According to the U.S. Department of Energy, an HVAC system that is not regularly maintained can use up to 25% more energy than one that receives proper care. That means a quick DIY fix does not just restore comfort faster; it also keeps your energy bills in check.
What Are the Most Common DIY HVAC Troubleshooting Steps?
The most effective DIY troubleshooting steps target the three components that cause the majority of residential HVAC issues: the thermostat, the air filter, and the electrical circuit. These checks require no special tools or technical training.
Check Your Thermostat Settings and Batteries
Incorrect thermostat settings are one of the most frequent causes of HVAC malfunctions and one of the easiest to fix. Before assuming your system has a serious problem, verify these basics:
- Confirm the mode setting. Make sure your thermostat is set to “heat” during winter and “cool” during summer. It is surprisingly common for the mode to be accidentally switched.
- Check the batteries. Dead batteries are a frequent source of thermostat failures. Replace them with fresh ones and see if the system responds.
- Review your programmed schedule. If you have a programmable or smart thermostat, check that the schedule has not been accidentally changed.
- Try a manual reset. Power cycling your thermostat can clear minor glitches. If you use a Honeywell model, follow our guide on how to reset your Honeywell thermostat for step-by-step instructions.
According to ENERGY STAR, the average American home spends nearly $1,900 per year on energy bills, with almost half of that going toward heating and cooling. A properly functioning thermostat is essential for keeping those costs under control.
Replace or Clean Your Air Filter
A dirty air filter is the single most common cause of HVAC inefficiency and reduced performance. When the filter becomes clogged with dust, pet hair, and debris, it restricts airflow and forces your system to work significantly harder to maintain your desired temperature.
Experts recommend checking your filter every month and replacing it every one to three months, depending on usage, the type of filter, and whether you have pets. For a detailed schedule based on your household, check out our guide on how often to change your air filter.
Dr. Jeffrey Siegel, a professor of civil engineering at the University of Toronto and a leading researcher in indoor air quality, has noted: “Filtration is the single most effective intervention for improving indoor particle concentrations. A clean filter not only improves air quality but directly reduces the energy your HVAC system needs to operate.”
Here is a quick comparison of common filter types and their recommended replacement intervals:
| Filter Type | Cost Range | Replacement Frequency | Best For |
| Fiberglass (MERV 1-4) | $1 to $5 | Every 30 days | Basic dust protection |
| Pleated (MERV 8-13) | $10 to $25 | Every 60 to 90 days | Homes with pets or allergies |
| HEPA (MERV 17+) | $25 to $50+ | Every 6 to 12 months | Medical-grade air quality |
Inspect and Reset Your Circuit Breaker
If your HVAC system will not turn on at all, the problem may be electrical rather than mechanical. A tripped circuit breaker is a common and easy-to-fix issue, especially after power surges or outages.
Follow these steps to check and reset your breaker:
- Locate your home’s electrical panel.
- Find the breaker labeled for your HVAC system, furnace, or air conditioner.
- If the breaker is in the “tripped” position (usually between ON and OFF), flip it fully to OFF and then back to ON.
- Wait 30 seconds for the system to reinitialize before testing.
Important safety note: If the breaker trips again immediately or repeatedly, do not continue resetting it. This is a sign of an underlying electrical issue that requires a licensed HVAC professional.
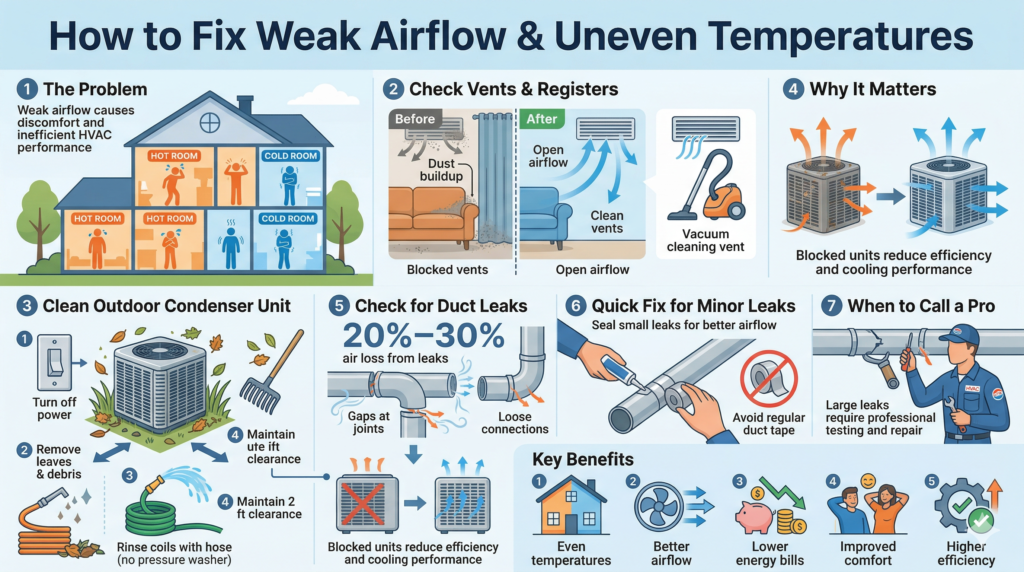
How Do You Fix Weak Airflow or Uneven Temperatures?
Weak airflow and hot or cold spots in your home are among the most frustrating HVAC issues. In many cases, these problems have straightforward causes that you can address without a service call.
Clear Blocked Vents and Registers
Furniture, curtains, rugs, and even toys can block supply and return vents, restricting the air circulation your system depends on. Walk through every room in your home and make sure all vents and registers are fully open, unobstructed, and free from dust buildup.
Use a vacuum with a brush attachment to clean visible dust from vent covers. This simple step helps your system distribute air evenly and prevents it from working harder than necessary.
Inspect Your Outdoor Condenser Unit
Your outdoor condenser unit needs adequate clearance and airflow to function properly. Over time, leaves, grass clippings, dirt, and other debris can accumulate around and inside the unit, reducing its ability to release heat.
Here is how to clean it safely:
- Turn off power to the unit at the outdoor disconnect switch or your circuit breaker.
- Remove any visible debris, such as leaves and branches, from around the unit.
- Use a garden hose with moderate pressure to gently rinse the condenser coils from the inside out. Never use a pressure washer, as high pressure can damage the delicate aluminum fins.
- Maintain at least two feet of clearance around the unit on all sides.
According to the U.S. Department of Energy, upgrading to energy-efficient HVAC equipment can reduce energy consumption by 20% to 50%. But even a high-efficiency system will underperform if the outdoor unit is blocked or dirty.
Look for Ductwork Leaks
If certain rooms in your home consistently feel warmer or cooler than others, leaky ductwork may be the cause. ENERGY STAR estimates that 20% to 30% of the air moving through a typical home’s duct system is lost due to leaks, holes, and poorly connected ducts.
You can do a basic visual inspection of any accessible ductwork in your attic, basement, or crawl space. Look for visible gaps at joints and connections. If you find minor leaks, seal them with mastic sealant or metal-backed tape. Never use standard cloth duct tape, as it deteriorates quickly and does not provide a lasting seal.
For extensive ductwork problems, contact a professional for pressure testing and repair.
What Should You Do When Your HVAC System Won’t Turn On?
A system that will not start at all can be alarming, but the cause is often something minor that you can check in just a few minutes.
Verify Power Supply and Safety Switches
Before assuming the worst, confirm that your system is actually receiving power:
- Check the furnace power switch. Many furnaces have a dedicated power switch located on or near the unit. It looks like a standard light switch and can be accidentally turned off during cleaning or storage activities nearby.
- Inspect the furnace door. Many modern furnaces have a safety switch that prevents operation when the access panel is not securely closed. Open the door, check for obstructions, and close it firmly until it clicks.
- Look at the condensate overflow switch. If your system has a condensate pump, a full or malfunctioning float switch will shut down the entire system to prevent water damage.
Try a System Reset
Modern HVAC systems can enter a safety lockout mode after power surges, outages, or brownouts. A simple system reset often clears these lockouts:
- Turn off your thermostat.
- Switch off the power to your HVAC system at the breaker panel.
- Wait at least 30 seconds (some manufacturers recommend up to five minutes).
- Turn the breaker back on.
- Set your thermostat back to your desired temperature and mode.
If the system starts up normally, the issue was likely a temporary glitch. If it fails to restart or shuts down again shortly after, the problem needs professional attention. Review our list of 13 common AC problems for additional guidance on what might be going on.
How Can You Handle Water Leaks or Unusual Noises?
Water pooling around your HVAC equipment and strange sounds coming from the system are two issues that homeowners frequently encounter. Some have easy DIY solutions, while others are red flags that call for professional repair.
Clear a Clogged Condensate Drain Line
Air conditioners and high-efficiency furnaces produce condensation during normal operation. This moisture drains away through a dedicated condensate line. Over time, algae, mold, and debris can clog this line, causing water to back up and pool around your indoor unit.
To clear the line yourself:
- Locate the condensate drain line (typically a PVC pipe near your indoor unit).
- Use a wet/dry vacuum to suction out the blockage from the outdoor end of the drain.
- Pour one-quarter cup of distilled white vinegar into the drain access point to kill mold and bacteria.
- Let it sit for 30 minutes, then flush with warm water.
Performing this maintenance every one to three months prevents clogs and protects your home from water damage.
Identify Warning Sounds That Need Professional Attention
Not all HVAC noises mean trouble, but some sounds indicate problems that should not be handled as DIY projects.
| Sound | Likely Cause | Action |
| Rattling or vibrating | Loose screws, panels, or debris | Tighten visible screws or remove debris (DIY) |
| Squealing or screeching | Worn fan belt or motor bearing | Call a professional |
| Banging or clanking | Loose or broken internal component | Turn off system, call a professional |
| Hissing | Refrigerant leak or duct leak | Call a professional immediately |
| Clicking (repeated) | Electrical relay or control board issue | Call a professional |
Mark Dawson, a certified HVAC instructor and technical trainer with HVAC Excellence, advises: “Homeowners should pay attention to any new or unusual noise from their system. A rattling sound might just be a loose panel, but a persistent banging or hissing noise almost always indicates something that needs trained hands and specialized tools.”
When Is It Time to Call a Licensed HVAC Professional?
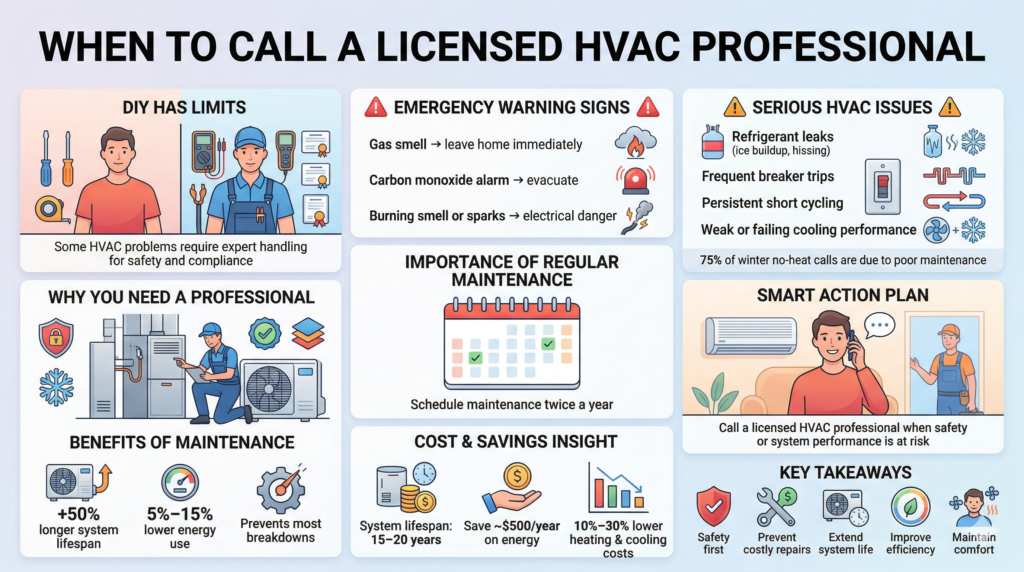
DIY troubleshooting has real limits. Certain HVAC problems involve safety hazards, specialized equipment, and legal requirements that make professional service essential.
Signs That Indicate a Serious Problem
Contact a licensed HVAC contractor right away if you experience any of the following:
- Gas odors. If you smell gas near your furnace, leave your home immediately and call your gas utility company. Do not flip any switches or use electronic devices.
- Refrigerant leaks. Handling refrigerants requires EPA certification and specialized equipment. Signs include ice buildup on coils, hissing sounds, and reduced cooling performance.
- Electrical problems. Burning smells, sparking, or frequently tripping breakers point to wiring issues that pose fire and shock risks.
- Persistent short cycling. If your system repeatedly turns on and off in rapid succession despite basic troubleshooting, the issue may involve an oversized unit, a failing compressor, or a faulty control board.
- Carbon monoxide detector alerts. A cracked heat exchanger can release carbon monoxide into your home. If your CO detector goes off, evacuate immediately and call emergency services.
Why Annual HVAC Maintenance Matters
The best way to avoid emergency breakdowns and costly repairs is to invest in regular HVAC maintenance. Research from the National Association of Home Builders found that consistent preventive maintenance can extend the lifespan of an HVAC system by up to 50%. The ENERGY STAR program confirms that well-maintained systems reduce energy usage by 5% to 15% compared to neglected ones.
Industry data shows that about 75% of winter no-heat service calls are caused by a lack of maintenance. Scheduling professional tune-ups twice a year, once in spring before cooling season and once in fall before heating season, keeps your system running at peak performance and catches small problems before they become expensive emergencies.
According to ServiceTitan’s 2026 industry report, the average HVAC system lasts 15 to 20 years with proper care. Homes using energy-efficient systems save an average of $500 annually on energy bills, and ENERGY STAR-certified equipment can cut heating and cooling costs by 10% to 30%.
Keep Your Home Comfortable With Ridgeline Heating and Cooling
Basic HVAC troubleshooting is a valuable skill for every Idaho Falls homeowner. Checking your thermostat, replacing your air filter, and resetting your circuit breaker can solve many common problems and save you both time and money. But when a problem goes beyond these simple fixes, or when safety is a concern, professional help is always the right call.
Ridgeline Heating and Cooling is here to help when you need a trusted, licensed HVAC contractor in Idaho Falls and the surrounding communities. Whether you need emergency repairs, a seasonal tune-up, or a full system replacement, our team provides reliable, cost-effective service with your comfort and safety as our top priorities.
Ready to schedule HVAC maintenance or need help with a problem you can’t solve on your own? Contact Ridgeline Heating and Cooling today to keep your home comfortable all year long.